
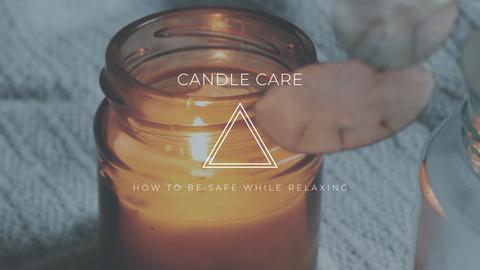
How To Care For Your Candle: Tips and Tricks For Proper Maintenance
I've been making candles for years and it never ceases to stun me that the main enjoyment of candles derive from lighting a jar full of stuff on fire.
Do I test for hours and hours, swapping wicks and jars for their differently sized counterparts? YES
Does that mean I lay awake at night, eyes wider than a forest frog, thinking of what could go wrong? YES
Candle safety is IMPORTANT
But there's no protection against the power burner (I'm looking at you unplanned napper, the certified risk takers).
We who call ourselves chandlers test for the unexpected, with safety being of the utmost importance.
Now you might be thinking "when I'm relaxing, the last thing I want to think about is precaution!" Such is the world we live in.
Just the other day I was grabbing a jar to work with when it FLEW out of my hands and pummeled the TV, cracking my best friend during quarantine.
Sh!t happens.
A great candle experience begins with tender loving care and proper maintenance.
I'm going to get down and dirty and give you the all-encompassing mini bible of candle care and maintenance. Behold, the FAQs of candle life:
1. MELT POOLS- The first burn is the deepest...
If you automatically thought of a pool filled with ice cream sundaes or grilled cheeses, I'm right there with you.
In the context of burning candles, however, the melt pool is actually something a lot of people don't think about. Aside from the maker's discretion in wax, wicks, and jar type, it's up to you, the burner, to keep it classy.
That first time you light up a candle, you're going to want the liquefied wax to reach the outer edges of your candle BEFORE blowing it out.
Candles should burn 1 inch in diameter for every hour they burn. Most jars I sell are about 2.5 inches in diameter. This means in 2 and a half hours, that top layer of wax should be completely melted.
Why is this important? It prevents TUNNELING.
Tunneling is when the wick burns straight down the center of a candle without creating a full melt pool.

I did this to a candle I made, just for you! Look at that ring.
Candle tunneling wastes wax and can be easily avoided by allowing the top layer of wax to reach the edges of your vessel on that first burn.
2. TRIM YOUR WICK
For the love of all things holy, you have to trim your wick! Not only is this going to give YOU a cleaner burn, but it's going to prevent any unnecessary disasters.
When wick trimming, you should always extinguish the flame and let the candle cool to room temperature.
Once your candle is cooled and wax is hardened, trim the wick to 1/4".
"But Britt, how do I trim a wick? Do I need shears?"
If you're fancy, use a wick trimmer. I personally use nail clippers. If you're not afraid to get a little messy, the quickest and easiest method is simply pinching the old, hardened wick away.
As long as your wick is 1/4" inch before you light it, you will be good to go.
If you forget to do this step, you'll notice the flame of your candle burns tall and wide, and the wick will begin to "mushroom." A mushrooming wick takes on the shape of Portobello as a result of carbon buildup.
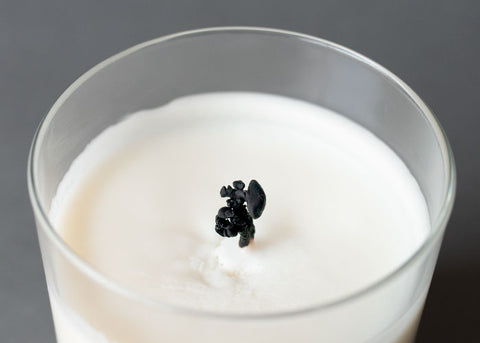
Image courtesy of Candlescience
Keep it tight with a short, trimmed wick for optimal safety.
3. USE YOUR LID
Every candle you receive comes with a recycled lid for safety during travel, but also for you to use throughout the lifespan of your candle- and beyond!
Lids protect the wax in your candle from daily dust and pet hair, and you can use them to prop up your jar and protect your surfaces. Placing the lid on your candle after its extinguished reduces smoke in the air, and keeps your candle's scent in tact.
4. LEAVE 1/2" WAX ON THE BOTTOM
It's super tempting to stretch your dollar and get every scent worth by burning down to the last ounce of wax, I hear you.
Doing this isn't a safe practice. I have provided a tutorial on how to save your leftover wax to make your very own candle!
Discontinue use of a candle when 1/2" of wax remains at the bottom of the jar. This will prevent possible heat damage to your surfaces or to the container itself. The glass can get hot on the bottom as the flame nears the base of the jar and most of the wax has been consumed.
Think of the wax as the buffer between direct heat and your container.
I've heard horror stories of candles exploding. I use thermal resistant glassware and test my candles endlessly, but to be safe, follow these procedures.
5. CANDLE SAFETY
The stuff I have to say, and with good reason:
Always burn candles well away from drafts, other heat sources, and anything flammable. Make sure burning candles are out of reach of children and pets. Never leave a burning candle unattended.
Store your candle out of direct sunlight and extreme temperatures. Aim for safe-keeping in a cool, dry place! It's best to store your candle in temperatures ranging between 50 degrees Fahrenheit and 80 degrees Fahrenheit.
Candles should not be burned for more than 4 hours at a time.