
How to Care For Your Candle
Tips and Tricks For Proper Maintenance
I’ve been making candles for years, and it never ceases to tickle me that the main enjoyment of candles comes from lighting a jar full of stuff on fire.
Do I test for hours and hours, swapping wicks and jars for their differently sized counterparts? YES.
Does that mean I lie awake at night, eyes wider than a forest frog, thinking about what could go wrong? Also yes.
Candle safety is IMPORTANT
But there’s no protection against the power burner (I’m looking at you, unplanned napper, the certified risk takers).
Those of us who call ourselves chandlers test for the unexpected, with safety as the highest priority. Still, a great candle experience begins with tender loving care and proper maintenance, and that part is up to you.
What to Expect from Natural Soy Wax
Moon Lit candles are made with natural soy wax, which means subtle variations. Soy wax expands and contracts with temperature changes, which can cause "wet spots." Wet spots appear as small, cloudy or translucent areas where the wax has pulled slightly away from the glass. They’re a natural cosmetic effect of soy wax and don’t affect how your candle burns or smells.
You may also notice "frosting." Frosting appears as a soft, white, crystal-like texture on the surface or sides of the wax. It’s a natural characteristic of soy wax and a sign of its plant-based composition. Frosting is purely cosmetic and does not affect burn quality or scent throw.
Behold, the FAQs of candle life:
1. MELT POOLS: The first burn is the deepest...
If you immediately pictured a pool filled with ice cream sundaes or grilled cheeses, I’m right there with you.
In candle terms, the melt pool is the layer of liquefied wax that forms as your candle burns, and it matters more than you think. Aside from the maker's discretion in wax, wicks, and jar type, it's up to you, the burner, to keep it classy.
On your first burn, allow the wax to melt as evenly as possible across the surface before extinguishing.
If about 1/8" of wax remains around the inner rim diameter during the first couple burns, that’s totally fine. As the vessel heats with continued use, the wax will naturally melt further toward the edges.
Rule of thumb: burn one hour per inch of candle diameter.
Most of my jars and tins (aka vessels) are about 2.5" wide, which means roughly 2.5 hours for a full top-layer melt.
Why does this matter? It prevents TUNNELING.
Tunneling happens when the wick burns straight down the center, leaving unused wax around the sides. It wastes wax and is easily avoided by giving that first burn the time it deserves.

I did this to a candle I made, just for you! Look at that ring.
2. TRIM YOUR WICK (I beg you...)
Not only does this give you a cleaner, better burn, it also prevents unnecessary drama.
Always extinguish your candle and allow it to cool completely before trimming.
Wick Care Breakdown:
-
Cotton wicks (long, thin): trim to 1/4"
-
Wood wicks (flat, wide): trim to 1/8"
"But Britt, how do I trim a wick? Do I need shears?"
If you’re fancy, use a wick trimmer. I personally use nail clippers. Ones like these (pic below) with a straight edge work perfectly!

If you’re not afraid to get a little messy, gently pinching off the hardened char with a piece of tissue works too.
If you skip this step, you’ll notice:
-
An overly tall flame
-
Smoke or soot
-
Wick “mushrooming” (carbon buildup that looks like a tiny portobello)
Short, trimmed wicks = safer, cleaner, happier burns.
As long as your wick is trimmed before you light it, you will be good to go.
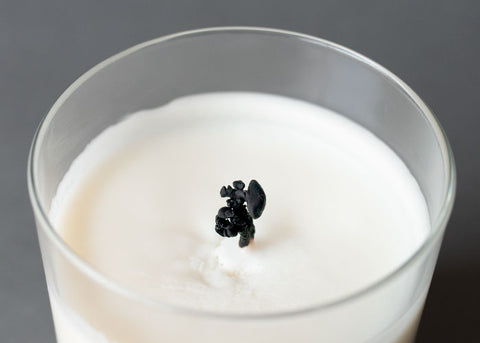
Image courtesy of Candlescience
3. USE YOUR LID
Every candle you receive comes with a lid for safety during travel, but also for you to use throughout the lifespan of your candle- and beyond!
Lids:
-
Protect wax from dust and pet hair
-
Help reduce lingering smoke when placed on the candle after extinguishing
-
Preserve scent between burns
-
Can even protect surfaces when placed underneath the jar
Your lid is part of the candle’s life cycle — and beyond.
4. LEAVE no more than 1/2" WAX ON THE BOTTOM
(Even when there is never a right time to say goodbye...)
I know it’s tempting to burn every last drop of wax. I hear you.
But for safety, discontinue use when about 1/2" of wax remains at the bottom of the jar.
That remaining wax acts as a buffer between the flame and the container. Burning past this point can cause the vessel to overheat and potentially damage surfaces.
I use thermal-resistant vessels and test obsessively — but the wax buffer is there for a reason.
Let's reduce and reuse together: I have provided a tutorial on how to save your leftover wax to make your very own candle!
5. CANDLE SAFETY (The Not-Fun-But-Necessary Part)
The stuff I have to say, and with good reason:
-
Never leave a burning candle unattended
-
Keep candles away from drafts, heat sources, and flammable items
-
Burn out of reach of children and pets
-
Do not burn candles longer than 4 hours at a time
-
Store candles in a cool, dry place (50°F–80°F is ideal)
-
Never move or touch a candle while the wax is liquid

